Our companies are backed by the Best Pick Guarantee. Call one today!
Springtime, with its eventful weather and abundant plant growth, is an ideal time to engage kids in fun science experiments. You won’t even have to track down a microscope or a set of test tubes—in fact, the sight of either may send your kids running in the other direction.
Instead, look around your house and yard for items to repurpose for fun projects and experiments that won’t make your kids think you’re trying to recreate their science classes at school.
I have vivid childhood memories of lining my mother’s kitchen windowsill with water-filled mason jars, carrot tops and avocado pits balanced carefully on top, anxious to see whether I could actually grow vegetables and fruit from seemingly nothing.
I can’t say that my amateur gardening experiments ever resulted in a healthy crop of carrots and avocados for the summer—Hass avocado saplings don’t take kindly to East Tennessee weather, as it turns out—but I did have a lot of fun watching the roots grow.
As I got older and my mother and I started gardening for real, I had a much better understanding of how each plant would grow and an appreciation for the time and effort involved in growing your own fruits and vegetables.
And when my mom explained to me that my tomato plants would grow better if I read to them, well, I was willing to try just about anything. Off I went into the garden, book and first-grader-sized chair in tow.
While I can’t make any promises that these next five projects will get your kids reading to a crop of tomato plants, I can attest to the fact that they are a lot of fun. From investigating the weather to watching worms squirm their way through soil, these five spring projects guarantee educational fun for both kids and adults.
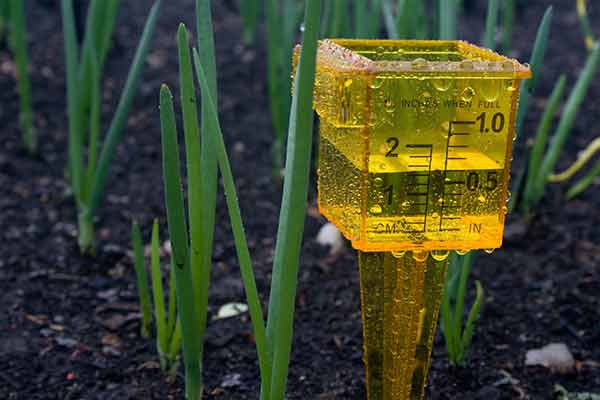
DIY Rain Gauge
 With a one-liter bottle, a pair of scissors, a ruler, and a permanent marker, you can create a simple rain gauge to use this spring. Here are the steps your kids to follow to make their own:
- Use a pair of scissors to carefully cut off the top part of the one-liter bottle.
- Invert that piece to create a funnel for the rain.
- Mark off a few inches with the ruler and permanent marker.
- Find a level spot in the yard to place the rain gauge.
- Wait for the clouds to roll in!
Homemade Weather Station
If measuring rainfall amounts doesn’t provide your family’s budding meteorologist with quite enough information, set up your own weather station. In addition to your DIY rain gauge, you’ll need the following materials:
- Thermometer
- Barometer
- Hygrometer to measure humidity levels
- Weather vane
Add an anemometer, a device that measures wind speed, for a complete setup.
Seed Nursery
 Gather up a few small, clear glass jars or containers and germinate seeds—no digging in the dirt necessary. Watch the roots grow, and when the plants are big enough, transfer them to a pot with soil. For even more edible fun, check out these vegetables that you can grow in water.
Colorful Flowers
Turn a run-of-the-mill bouquet of white carnations into something truly fantastic with a pair of scissors, a vase or collection of glasses or jars, and a few bottles of food coloring.
- Use the scissors to cut about an inch from the bottom of each stem
- Place the flowers in vases filled with water and food coloring.
In a matter of hours, you’ll see the carnations’ petals changing hue as the colored water makes its way through the various parts of the flowers.
DIY Wormery
 They’re not the prettiest critters, but worms are an important part of a healthy garden. A DIY earthworm habitat will let you watch these creepy-crawlies up close to see how they do their jobs.
- Begin with a shallow layer of pebbles in the bottom of a clear plastic container, and fill up the container with alternating layers of sand and soil.
- Add a small amount of water, and then introduce a few worms to their new home.
- Finish off your new wormery with some leaves and grass. Be sure to poke holes in the container’s lid before screwing it back on.
As the worms get comfortable in their new habitat, you’ll see the leaves, sand, and soil get mixed up together. After a few weeks, return the worms—and the rich soil mixture they’ve created—to your yard.
Ready to Experiment?
Make sure you have all the necessary supplies on hand before you start a project. Nothing is more frustrating than having to pause the momentum of an engaged child to run out to the store.
Encourage good habits by cleaning up the work area as you go—don’t wait until the end of the day or weekend to tidy up, or you may find that you need to call in the pros.
Science experiments aren’t just for school, and they can be a lot of fun for the whole family. With a few simple supplies, you can bring the best, most fun parts of science class to your kitchen table.


