Quality matters when hiring for a big project. Call a Best Pick now!
Many years ago, when we were saving for a down payment on our first home, my husband and I moved from our chic midtown apartment and into a dreary (though much cheaper) mid-sixties, tri-level rental house.
The walls on the main floor had been painted gaudy shades of yellowy orange and brick red—not to my taste at all. I knew that I didn’t want to spend a year living in an orange-and-red cave, so I announced to our landlord that I would paint the living room, dining room, and kitchen.
My own design style tends to be fairly minimalist, and I prefer light, cheerful colors—especially for rooms without many sources of natural light. I hemmed and hawed in the paint department of our local home improvement store until I finally decided on a beautiful shade of buttery ivory for the living and dining room and a bright celery green for the kitchen.
I knew I was making a pretty dramatic paint color change, so I anticipated needing a coat of white primer and a couple of coats of paint for each wall. I figured I’d be done in a long weekend.
I was so wrong.
About three weeks and two five-gallon buckets of primer later, I was finally done—both with the walls and with my career as an amateur house painter.
Nonetheless, I learned a lot through that experience. If you’d like to avoid the painting pitfalls I encountered, keep reading for the best tips and tricks for painting over dark colors (or colors that you just don’t like).
Prep the Walls

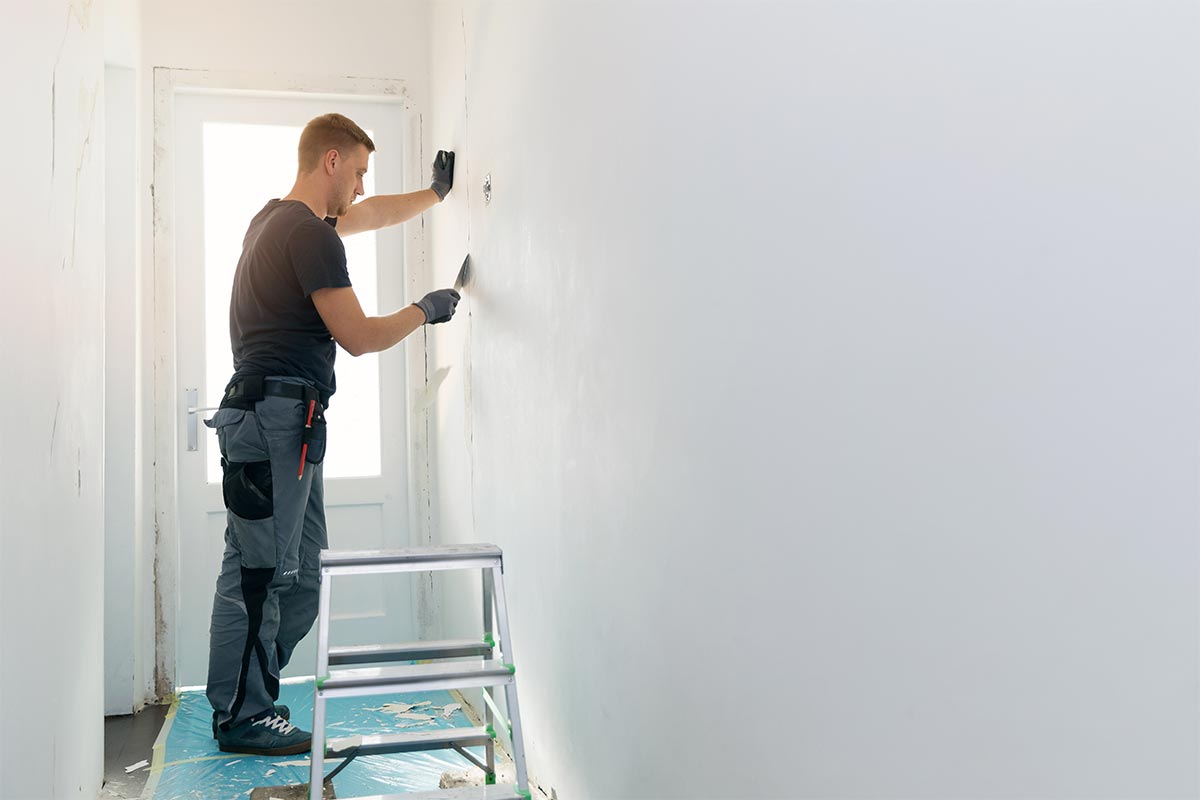
The quality of the paint, rollers, and brushes you buy won’t really matter if your walls are rough and scarred. Not sure how to prepare walls for painting? You’ll find some excellent painting prep tips in our blog article on the subject, but here’s a quick review:
1. Remove anything that is not permanently affixed to the wall.
This includes all switch and outlet plates, wall-mounted light fixtures, and decorations. Pull all furniture away from the wall (and cover it with a drop cloth) to give yourself plenty of room to maneuver.
2. Use needle-nose pliers to remove drywall anchors.
Don’t try to putty and paint over those little suckers. Believe me, you will be able to see them once it’s all said and done.
3. Fill holes and cover imperfections with spackling or joint compound.
This is the fun part. Use a putty knife to work compound into the holes, and then level off the surface with the wide side of the blade. Let the compound dry fully before sanding.
4. Use fine-grit sandpaper and an orbital sander to sand down rough areas and high spots.
An orbital sander will make this process go a little quicker, but you’ll have to be careful not to sand away more than you intended. For small areas or tight corners, sanding by hand may be the better option.
5. Cover and sand any additional imperfections.
If you notice any other areas that need a coat of joint compound and another round of sanding, repeat steps three and four.
6. Wash the walls.
Sanding creates a lot of dust, and painting over it will result in an uneven finish. Dampen a cotton towel with either water or rubbing alcohol, and thoroughly wipe down the walls. Alcohol evaporates quickly, so you won’t need to wait as long to begin taping and painting.
7. Tape off trim, baseboards, and the ceiling.
Use painter’s tape for this step. It can be a little tedious, but the tape is what will keep your paint job from looking messy. To ensure a nice, sharp line, run your putty knife quickly down a length of tape—the heat from the friction of the blade will warm the glue in the tape, making it adhere better.
8. Start painting!
Assemble all your supplies before you begin to avoid running all over the house mid-task. And don’t forget to cover the floor with a drop cloth or an old sheet.
Tinted Paint Primer: A Color-Change Essential

If you’ve painted a room before, you’re probably familiar with primer, but have you ever used tinted primer? If not, you’re missing out.
Priming the walls is an important step in any painting job, but it’s a non-negotiable part of painting over dark colors. Why is primer so essential? Well, it does a few important things:
- Creates a slight texture on the wall, which helps paint stick
- Helps block stains and odors
- Ensures that the color of your topcoat appears true to the swatch you selected in the store.
- Fills the pores of bare wood and drywall, helping you achieve a smoother finish (and use less of your expensive topcoat)
Under normal circumstances, a standard white primer is all you’ll need, but when you’re making a dramatic paint color change, spring for a tinted primer. I cursed my decision to forgo tinted primer many times as I was painting our rental house.
Tinted primer is a white primer that contains a small amount of your topcoat color, making the color change easier. I took the kitchen in our rental from a deep brick red to a light green. Even after three coats of primer, that red was still visible, which meant that I needed three applications of topcoat.
Had I used a tinted primer, each coat of primer would have brought me just a tad closer to the celery green I was aiming for, and I probably would have gotten away with only two applications of topcoat. And maybe I wouldn’t have thrown that paint roller across the room in frustration.
You can try tinting primer yourself, but to avoid wasting product (and money), your best bet is to ask one of the specialists in the paint department of your local home improvement store for help.
Primer tips
1. Choose the right primer for your needs.
Just like paint, primer comes in water-based and oil-based formulas. For most jobs, water-based primer will be just fine (and easiest to work with); if you’re trying to cover tough stains and odors, like those from nicotine and cigarettes, opt for an oil-based product.
2. Apply thin coats.
In all likelihood, you’ll use more primer than paint for a significant color change, and layers of paint—especially the thick formulas used for primers—can build up quickly and take longer to dry.
3. Prime the entire surface.
Primer is not an as-needed product, especially when you’re covering a dark color. If it’s applied unevenly, you’ll see inconsistencies in the finish. Apply primer as you would paint: begin by edging around corners, trim, and the ceiling, and then roll the large expanses of wall.
4. Don’t skimp on the number of coats.
The number of coats you’ll need depends on the shade of paint you’re covering, but as a general rule, one coat of primer isn’t going to cut it. If you’re taking the walls from a deep, saturated shade to a light color, the walls should look white (or lightened, if you’re using tinted primer) before you switch to the topcoat.
Choosing the Right Paint

Deciding on the right color and type of paint is not easy, and the variety of choices doesn’t do much to simplify the decision-making process. Here’s some information to help you narrow down your options.
Oil-based vs. latex
Environmental protection regulations have made oil-based interior paints less common, but advancements in the quality and performance of latex (or water-based) paints have filled the gap.
Latex paint is easier to work with—no need to soak brushes and rollers in mineral spirits or turpentine—and better for your health and the health of the environment. Strong odors give me an almost immediate headache, so I always choose low-VOC latex paint products.
Paint vs. paint and primer combo
Paint and primer combination products are a popular option, and manufacturers have worked hard to continuously improve the formulas over the years. Still, a professional painter will most likely not use a combination product.
Here’s why:
- Self-priming paints are thicker and can be a little more difficult to work with, especially if the walls aren’t in great shape to begin with.
- Self-priming paints are not cheap. If you’re planning on painting several rooms, the more cost-effective choice will likely be a five-gallon bucket of primer and individual gallons of your preferred topcoat.
That being said, I’ve used many gallons of paint and primer combination products over the years with great success—well, aside from the time I didn’t realize I’d dunked one leg of my stepladder into the can of paint and then proceeded to drag the paint-covered ladder all over my guest bedroom.
However, for an extreme color change (or if you’re a stickler for perfectly smooth walls) opt for a few thin coats of primer followed by a good-quality latex paint in your favorite color. Separate layers of primer and paint will yield the best, most even results.
Eggshell vs. semigloss (vs. satin vs. gloss vs. matte)
There are a lot of paint finishes to choose from, and the decision you make should be largely driven by practicality.
The walls in kitchens and bathrooms, for example, take more of a beating than those in bedrooms. Your hallway will be more prone to scuffs and swipes if you have small children or teenagers, but less so if it’s just you and your spouse.
Here’s a quick guide to the types of paint finishes you’re likely to encounter:
1. Gloss/High gloss. Paint with this finish shines and reflects light. It’s designed for trim because it’s easy to clean.
2. Semigloss. Semigloss paint tones down the shine but is still easy to clean. This is the finish I chose for my kitchen and bathrooms.
3. Satin. If you want to stick to just one finish throughout your home, choose satin. It’s the perfect compromise between paint that isn’t shiny but is easy to clean.
4. Eggshell. An eggshell finish is great for walls that aren’t in perfect shape and rooms that you don’t use very often. Stains and scuffs are much harder to remove from an eggshell finish.
5. Matte/Flat. Matte paint gives a room a very sophisticated look, but it’s virtually impossible to clean without marring the finish. Matte paint is an elegant choice for formal living and dining rooms (and bedrooms, if you don’t have children).
The Bottom Line
If you’re house hunting, don’t mark a house off your list just because it’s painted a color that you absolutely hate. You’ll need to factor in your specific budget, of course, but in most cases, changing paint colors is one of the least costly projects you can take on.
Painting over dark colors and novelty paints is not easy, but it is always an option. If you’re up to taking on the challenge yourself, be sure to follow these steps:
1. Prep the walls as well as you can.
2. Spring for high-quality, tinted primer.
3. Choose the right finish for your needs—my favorite is satin.
And if you’re like me and have taken a vow to let the pros handle your house painting needs, a Best Pick painter is only a phone call away!


