Tired of the dated textured ceiling? Often called popcorn because of the bubbly look, this type of textured ceiling was commonly used from the late 1960s through the mid-1990s. Thankfully, it is very easy to remove with just a few basic tools. The biggest risk of removing popcorn texture from your ceiling is the potential presence of asbestos. Some older popcorn materials contained asbestos, which can lead to a number of health risks and even cancer. However, it is safe to remove popcorn ceiling yourself in most cases. These simple steps explain how to remove popcorn ceilings quickly and safely.
Can You Remove a Popcorn Ceiling Yourself?
DIY popcorn ceiling removal is extremely easy and only takes a few basic tools. The biggest issue with scraping away the popcorn texture on your ceiling is that it makes a huge mess. If you are worried about the mess or do not have the time to do it yourself, it is a common service that many painters and handyman companies offer.
Is It Safe To Remove a Popcorn Ceiling?
Unfortunately no, it is not always safe to remove textured popcorn from the ceiling. Most of the popcorn texturing produced before 1980 contains asbestos, a chemical that is known to cause lung cancer.
The only way to determine whether there is a risk is with costly asbestos testing. While there are commercially available asbestos testing kits, they are not always accurate. Due to the health risks, it’s safer to assume all popcorn ceilings installed before 1980 contain asbestos.
The only option for dealing with an asbestos popcorn ceiling is either to hire a professional asbestos abatement contractor or to encapsulate the ceiling with new drywall. You can discuss your options with an asbestos professional for more information and cost estimates.
The Best Way To Remove Popcorn Ceiling
The best way to remove a textured popcorn ceiling is with a large paint scraper or drywall trowel. However, jumping into scrapping right away can leave a huge mess. While removing a popcorn-textured ceiling is easy, you need to gather the right supplies and prep the work area. Otherwise, you will be cleaning up popcorn bits for years.
1. Gather Supplies
Strictly speaking, a large paint scraper is the only tool you need to remove a popcorn ceiling. But there are a number of other tools and supplies that will make the process easier and much less messy.
You will need some basic tools like screwdrivers, a hammer, and an adjustable wrench to remove lighting fixtures. A ladder will make reaching the ceiling much easier. A 3 to 4 inch putty knife will help remove popcorn around sharp corners.
You will also need at least one heavy-duty canvas drop cloth and several sheets of plastic to collect all the popcorn as it falls. Painters tape is great for closing off electrical outlets and for sealing the drop cloth to the walls.
A pump sprayer for water and dish soap will make removing the popcorn much easier. While you can use a spray bottle instead, it takes a lot more effort to saturate the ceiling than the pump sprayer.
You will also need joint compound to seal and smooth the ceiling and sandpaper to remove any rough edges.
Although not absolutely necessary, a long extension cord and a portable work light will make seeing in the room much easier.
Scraping popcorn off of the ceiling will also release a lot of dust and debris. You should wear eye protection and a dust mask or ventilator to keep that out of your eyes and nose. While not necessary, water-resistant work gloves might make the process more comfortable as well.
2. Clear Out the Room
Next, you should completely empty the room. Remove anything that isn’t bolted to the floor. If you have to leave large items in the room, cover them with a heavy-duty canvas drop cloth. Then cover that with a layer of plastic sheeting for added protection.
3. Remove Ceiling Lights and Fans
Then remove any ceiling fans and light fixtures. Taking them down will make the whole process easier and help prevent accidental damage. Cap the electrical wires with wire nuts to prevent shocks while you remove the popcorn.
4. Cover Electrical Outlets and Fixtures
You should also cover outlets and fixtures with plastic sheeting and painters tape. Cut a pick of sheeting that is roughly 12 inches square to cover the electrical outlet, then tape it to the wall. This will block out water and prevent electrical shocks.
If possible, shut off the electricity in the room while you work. Use an extension cord and a portable light so you can see while working.
5. Protect the Floors, Doors, and Windows
Then cover the floor with a heavy canvas drop cloth. Have the canvas come up the wall at leave a few inches on every side of the room. Then top that with a layer of plastic sheeting. Use painters tape to secure the sheeting to the wall, forming a total barrier.
Once the floor is covered, move on to your doors and windows. Cover doors with two layers of heavy plastic sheeting. Secure them above the door frame with painters tape. Repeat this process with windows.
6. Spray the Ceiling With Water
You are finally ready to start removing the popcorn ceiling. Fill the pump sprayer with warm water and add two or three squirts of liquid dish soap. Pump the sprayer, then apply the mixture to a four-foot square section of ceiling. If you are using a spray bottle, you will need to work in smaller sections to soak the ceiling.
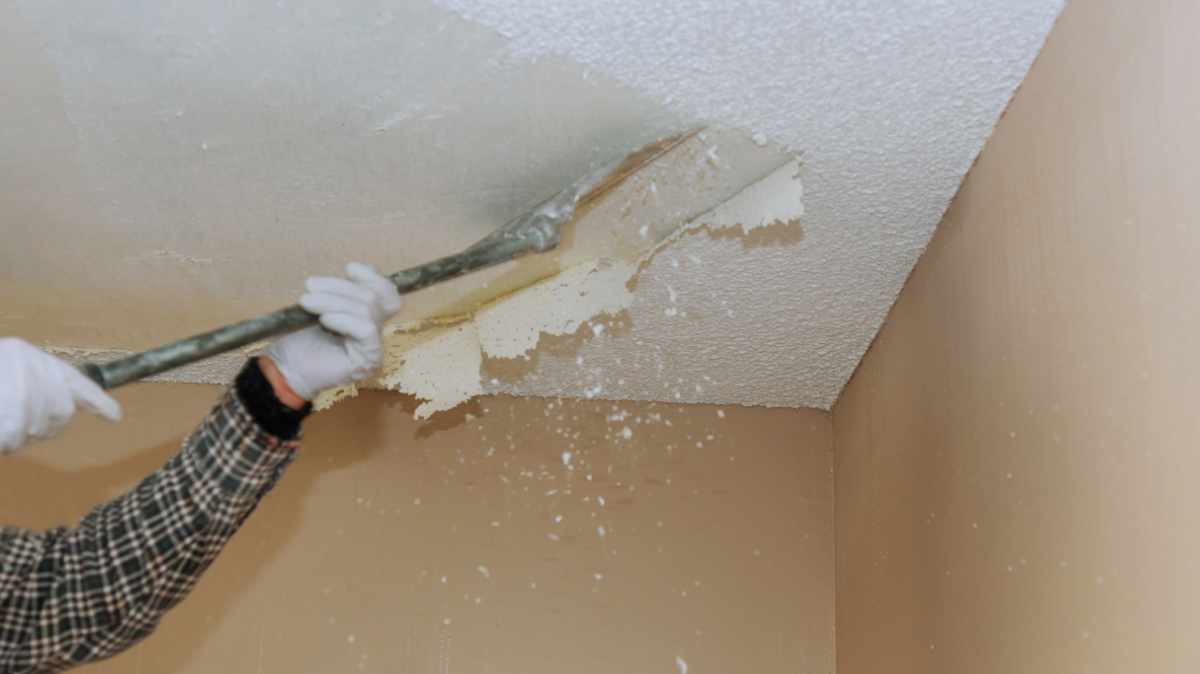
7. Scrape Away the Popcorn
Use a wide paint scraper or drywall trowel to remove the popcorn. Use smooth steady strokes to scrape away the material. For stubborn popcorn, use quick, short strokes to loosen it. You can also spray on more water. Repeat steps 6 and 7 until you have removed all of the popcorn texture. Wait at least 24 hours for the ceiling to dry before continuing to the next step.
8. Skim Coat and Sand
Once the ceiling is completely dry, skim-coat the surface with joint compound. This will fill any gaps and ensure a smooth finish. Let the mud dry completely, then light sand any rough areas. Depending on the condition of the ceiling, you may need to repeat this step a few times to get a smooth ceiling. At this point, you can remove the plastic sheeting, using it as a trash bag to remove all the popcorn and drywall dust.
9. Prime and Paint
You then need to prime and paint the ceiling. Use two coats of high-quality interior primer to seal the drywall. Then apply one to two coats of top coat finishing paint.
10. Reset the Room
Lastly, you can remove the canvas drop cloth and reset the room. Reinstall the lighting and fans, remove the electrical outlet covers, and move the furniture back inside.


